8 Tips For Staying Safe And Secure On Twitter
Nabamita Sinha, 3 weeks ago
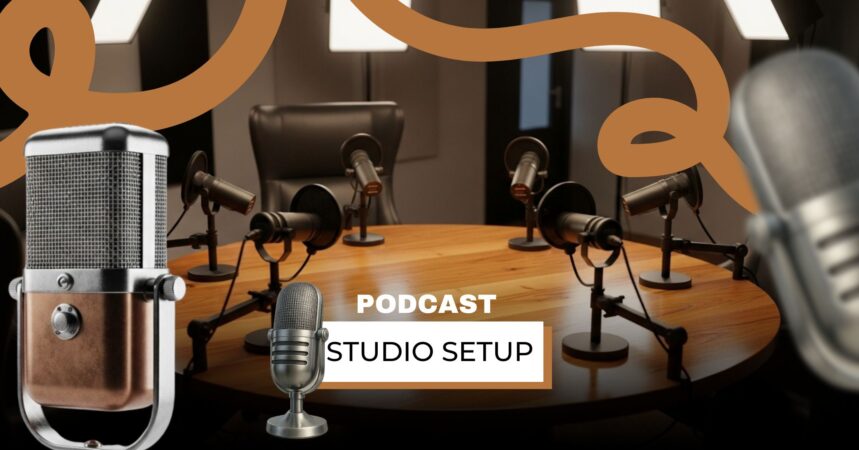
Podcasting has evolved from a hobby — it’s now a respectable creative medium powering entertainment, education, and business communication. New entry points cost less than ever before in 2025, but quality separates them.
Listeners want immaculate, close-mic audio and an integrated experience from show to show. Whether you’re launching your first show from a spare bedroom or scaling to a multi-guest production space, your studio setup plays a critical role in shaping your audio identity.
This in-depth guide walks you step by step through all the aspects of podcast studio setup — from inexpensive starter packages and room choice to pro-level audio chains, acoustics, and workflow optimization.
We’ll show you price-based podcast equipment suggestions, discuss why acoustics trump cost-lier gear, and even provide budget breakdowns, setup checklists, and placement schematics so you can get up to speed putting together a system that suits your needs.
Let’s cut to the chase before we get into room treatment or signal flow details. This is honestly what you can use to record a clean, publishable podcast today — in order of budget and scalability.
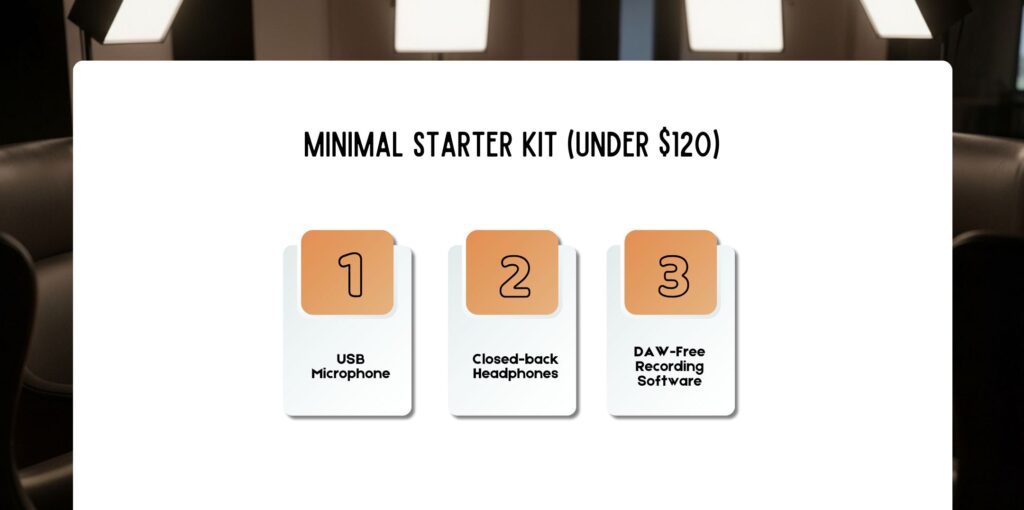
Keep it straightforward and functional if you’re just beginning. These are plug-and-play and will not need special drivers or mixers.
Why this matters: This setup is suitable for clarity and fewer technical resistances. You’ll sound much clearer compared to recording a laptop mic directly.
As your show grows, a leap to XLR-based gear brings in tone and flexibility. This level suits small groups, two-host programs, or producers seeking improved production quality.
Why this tier rocks: It becomes crystal clear how a USB mic stacks up against a solid XLR mic/interface combo — smoother, deeper, and more broadcast-grade.
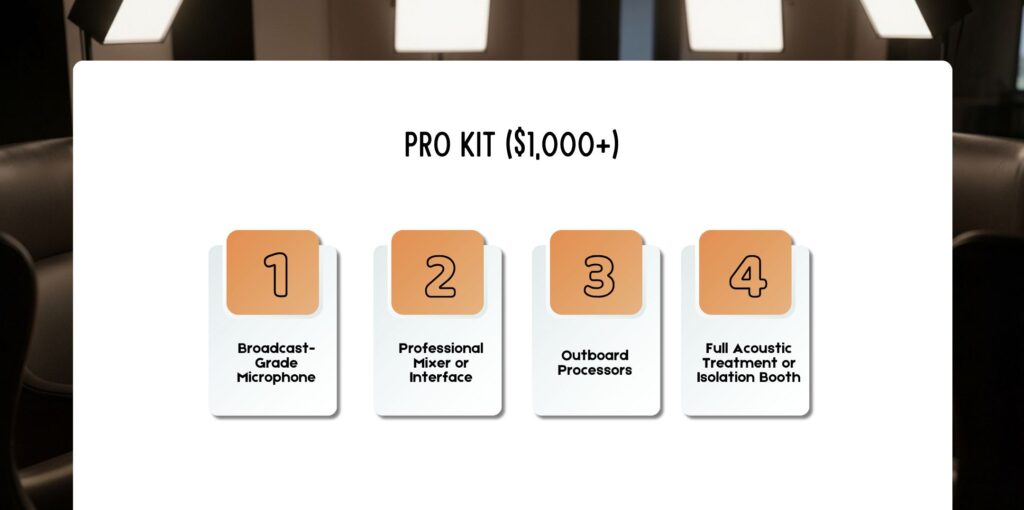
Once your show becomes an extension of your brand, pro hardware is an investment that future-proofs your operation. This tier enables multi-host shows, guests, video integration, and pro editing workflows.
For whom: Professional podcasters, recording studios, and production houses who require flawless, scalable sound.
Your room is as critical as your mic. Even the world’s best mic can sound terrible in a bad room.
💡Tip: Conduct a “clap test.” Clap hard in the room and listen for reverberation. The less loud and brief the reverberation, the better your space.
With a podcast studio setup, sound quality is very important. For that reason, soundproofing and other sound treatments are something that you need to look into.
Both of these are frequently conflated but concern different issues:
| Concept | Purpose | Typical Methods | Cost Range |
| Soundproofing | Keeps unwanted sound out | Mass-loaded vinyl, double drywall, gap sealing | $200–$3,000+ |
| Sound Treatment | Enhances sound quality within | Foam panels, bass traps, diffusers | $50–$1,000+ |
Briefly: You soundproof to prevent outside noise and treat to get a natural voice.
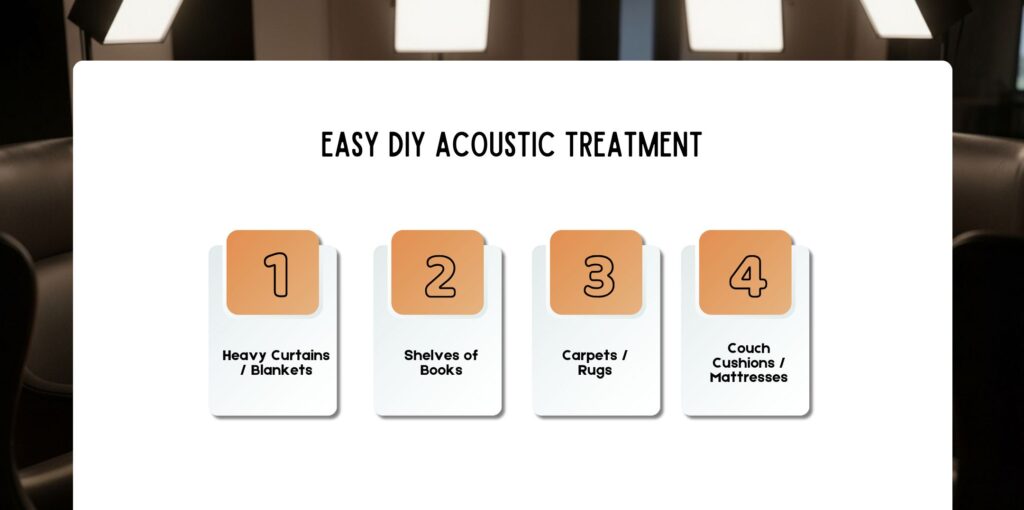
Much can be done on the cheap.
Projected Improvement: DIY-treated room can reduce echo by 30–50%, projecting your voice a tighter, “in-the-room” sound.
When your podcast income can afford it, invest in the best-of-the-best voice acoustic panels.
Result: Balanced, controlled acoustic field that brings warmth and definition — the equal of professional radio studios.
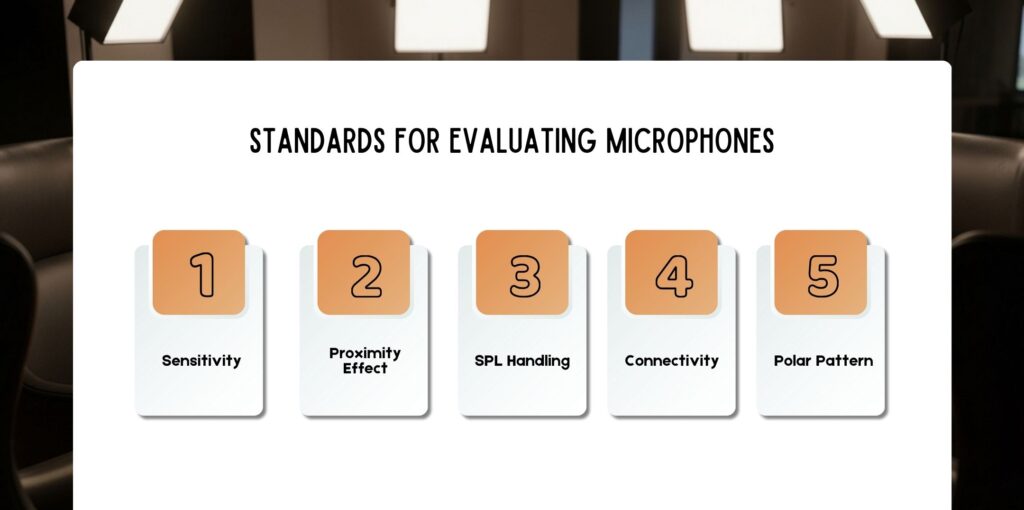
To start a podcast, it is very important to have a good-quality microphone. When you are asking podcast questions, it is important that the questions are recorded with good-quality sound.
| Type | Characteristics | Best For |
| Dynamic | Less sensitive, noise-rejecting, rugged | Untreated or noisy rooms |
| Condenser | Brighter sound, detailed, sensitive | Treated studios |
| USB | Plug-and-play, non-expandable | New artists |
| XLR | Adjustable, expandable, higher fidelity | Professional to intermediate artists |
💡Tip: Less stressful dynamic mics; condensers sound more “hi-fi” but take quiet rooms.
| Model | Type | Connection | Price | Best Use |
| Samson Q2U | Dynamic | USB/XLR | $70 | Beginners, hybrid use |
| RØDE PodMic | Dynamic | XLR | $120 | Punchy, sharp tone |
| PreSonus Revelator | Condenser | USB | $200 | Solo, home use |
| Shure MV7 | Dynamic | USB/XLR | $250 | Dual-mode convenience |
| Sennheiser Profile | Condenser | USB | $150 | Modern sound, plug-and-play |
| Shure SM7B | Dynamic | XLR | $399 | Professional broadcast standard |
Your mixer or interface is the bridge between your computer and microphone.
When to use which:
Monitoring exactly ensures sound consistency between episodes.
💡Tip: Don’t use Bluetooth headphones — they add latency.
Example setup: Boom mic → XLR → Audio Interface → USB-C → Laptop.
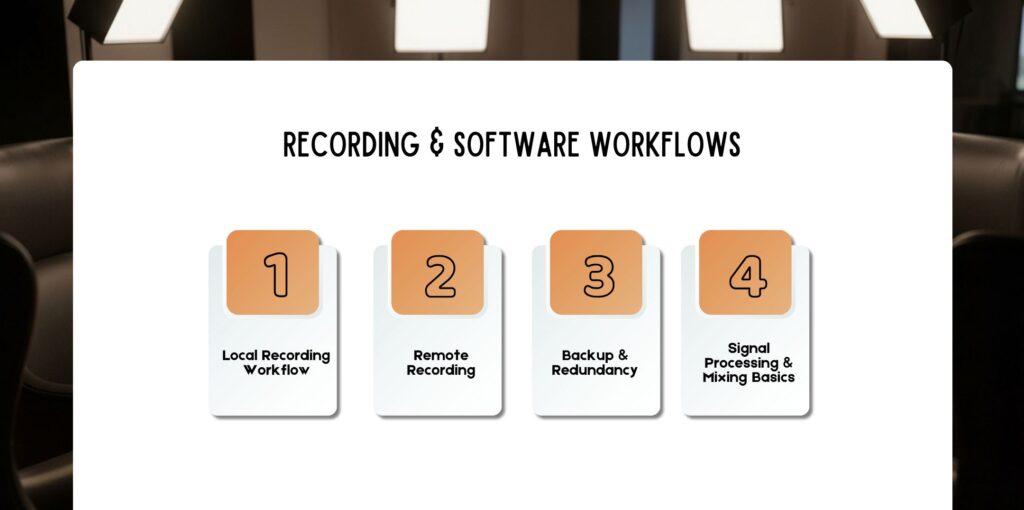
Recording devices and other software devices that are needed for your podcast studio setup are listed below;
Use a Digital Audio Workstation (DAW) to edit and master the lot:
Recommended settings:
💡Tip: Record 10 seconds of room tone at the start of each session for noise reduction.
When doing remote recording with guests:
💡Tip of the pros: Do individual WAV tracks per speaker for easy post-editing.
Thumb rule: Two on location, one in the cloud — always.
Related Resource: Adobe Podcast: How To Use This AI-Powered Tool For Podcasts?
Good processing takes raw recordings to broadcast audio.
Tools: FabFilter Pro-Q3, Waves Vocal Rider, or free alternatives such as ReaEQ in Reaper.
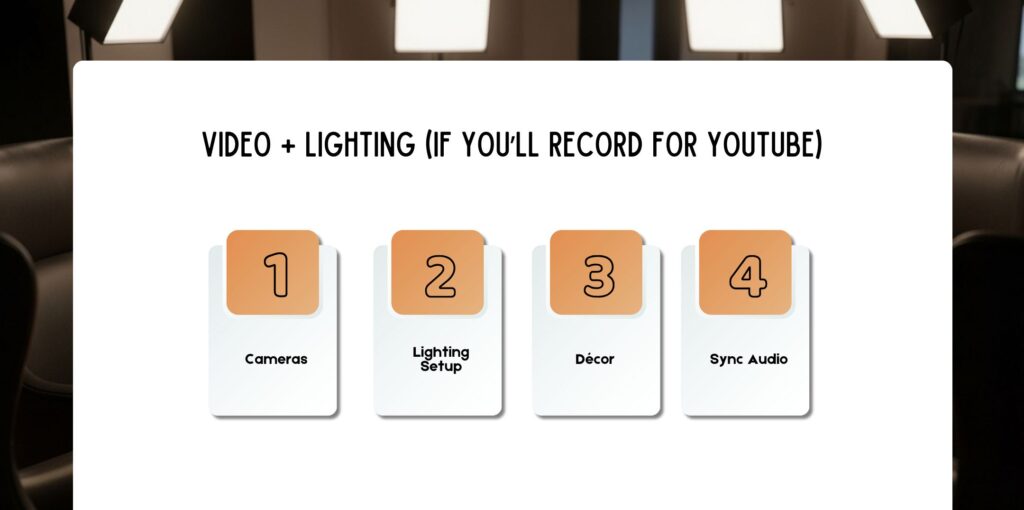
Podcasting on camera increases reach but requires visual planning.
Note: Sound is still king — poor sound will kill audiences faster than poor lighting.
Your podcasting studio grows with your podcast:
💡Pro Tip: Upgrade your environment first and foremost — it makes larger audio improvements.
Here are a few questions and queries on the topic of podcast studio setup that others have asked, and you might find helpful at the same time.
Use $100–$300 for a starter kit, $500–$1,000 for intermediate, and $2,000+ for professional studios.
Approximately 4–8 hours, depending on how fancy you want your setup to be, from furniture building to cable organization and software installs.
USB if recording alone, XLR if multi-hosting or requiring future flexibility.
Absolutely. A bit of treatment makes a large impact in reducing reflections and perceived quality over any mic upgrade.
Yes — use Riverside or Zencastr and have everyone record locally.
Average level around -12dBFS; peaks at below -6dB.
Acoustic treat your room, close windows, and use dynamic mics.
Budget: RØDE PodMic, or Pro: Shure SM7B.
Yes — always purchase fire-rated, low-VOC products.
Add channels for the mic, enhance the interface, enhance the acoustics, and add cameras for video podcasts.
Creating the ideal podcast studio setup is a process, not a one-time thing. The ideal setups change with your material, audience, and goals. Comfort and sound quality are paramount, then aesthetics and video production.
By 2025, technology will have never made it easier to sound professional at home — but a care for acoustics, workflow, and detail can still separate the amateur from the master pro. Start small, get to know your equipment, and your voice will find its audience.
Also Check: How To Cite A Podcast — MLA, APA & Chicago (with Examples & Templates)

Nabamita Sinha loves to write about lifestyle and pop-culture. In her free time, she loves to watch movies and TV series and experiment with food. Her favorite niche topics are fashion, lifestyle, travel, and gossip content. Her style of writing is creative and quirky.